
Bicycles are marvels of engineering simplicity and efficiency. However, like any finely tuned machine, they require regular maintenance to perform at their best. Among the most crucial components in need of attention are the crank bearings, which facilitate the smooth rotation of the crankset and, by extension, the bicycle’s drivetrain.
This article will guide you through the process of changing your bike’s crank bearings, ensuring that your ride remains smooth and efficient.
Introduction to Crank Bearings
Crank bearings, nestled within the bottom bracket of your bicycle, are pivotal to your bike’s performance. They bear the brunt of the force transmitted from your legs to the bike, enabling forward motion. Over time, these bearings can wear out or get damaged, leading to inefficient power transfer, annoying creaks, and even the risk of damage to other components. Recognizing the signs of worn bearings—such as stiffness, grinding, or lateral play in the crank—can save you from a more costly repair down the line.
Tools and Materials Needed
Before embarking on this maintenance journey, ensure you have the following tools and materials at your disposal:
- Crank puller
- The bottom bracket tool compatible with your bike’s bottom bracket
- Adjustable wrench or set of Allen keys
- New bearings or a new bottom bracket assembly (depending on your bike’s design)
- High-quality bicycle grease
- Safety gear: gloves and eye protection
Preparing the Bicycle
Securing Your Work Area: Start by securing your bicycle in a bike stand or flipping it over so it rests on the handlebars and seat. Clean the crankset and bottom bracket area to prevent any dirt from entering the bearing surfaces during the replacement process.
Removing the Crankset
Pedal Removal: Begin by removing the pedals from the crank arms. Remember that the left pedal has a reverse thread.
Detaching the Crank Arms: Use the crank puller tool to detach the crank arms from the spindle. This may require the removal of a bolt or nut, for which you’ll need an adjustable wrench or an Allen key.
Chainring Consideration: In some cases, you may need to remove the chainrings from the crank arms for better access. This step is optional and dependent on your specific bike model.
Extracting the Old Bearings
With the crankset removed, you’re now ready to extract the old bearings from the bottom bracket shell.
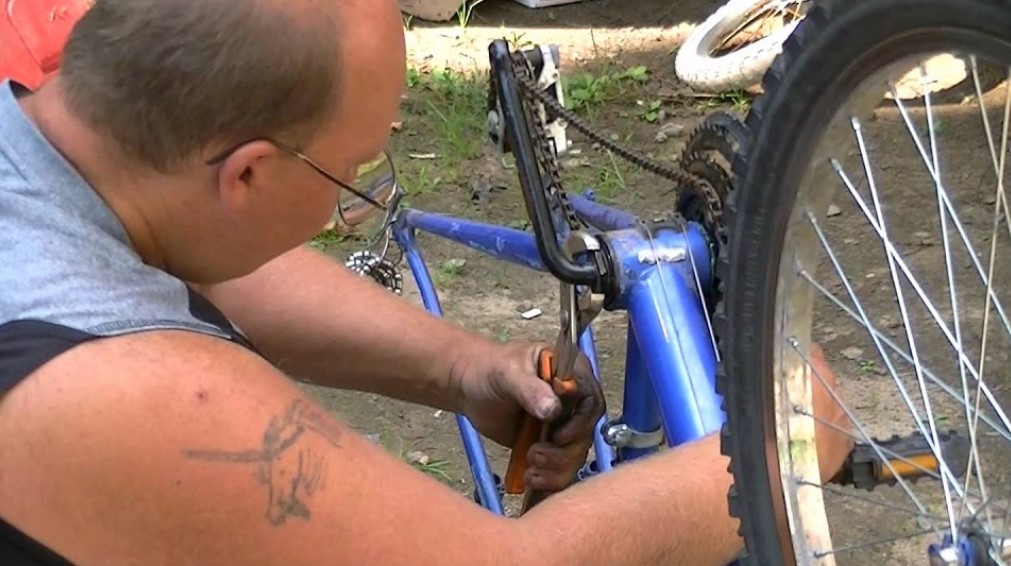
Bottom Bracket Removal: Employ the bottom bracket tool that matches your bike’s bottom bracket design to unscrew and remove the bottom bracket from the frame.
Old Bearing Removal: Once the bottom bracket is out, remove the old bearings. Some systems have press-fit bearings that will require a specific tool for extraction, while others might come out with the bottom bracket assembly.
Installing New Bearings
To enhance the “Installing New Bearings” section with expert insights, let’s integrate advice from Allen Chen, the founder of Bearing MFG, a leader in the bearing manufacturing industry. His expertise can offer readers professional guidance and best practices in selecting and installing new bearings for bicycles.
Installing New Bearings
Selecting the correct bearings for your bicycle is paramount for ensuring the smooth performance and longevity of your bike’s bottom bracket system. Bearings come in a myriad of sizes and types, so verifying compatibility with your bike’s specific bottom bracket is critical.
Expert Insight from Allen Chen, Founder of https://bearingmfg.com:
Allen Chen emphasizes the importance of understanding the differences between bearing types and their applications in bicycles. “Not all bearings are created equal,” he notes. “For bicycles, precision and durability are key. Choosing high-quality sealed bearings can significantly enhance your ride’s efficiency and reduce maintenance needs over time.”
Greasing:
Apply a liberal amount of high-quality bicycle grease to the new bearings and the bottom bracket shell. This not only reduces friction but also provides a protective barrier against corrosion and wear. Allen advises, “Using a bicycle-specific grease can make a considerable difference in performance. It’s formulated to withstand the unique stresses that cycling places on bearings.”
Bearing Installation:
Carefully press or screw the new bearings or bottom bracket assembly into the frame, ensuring they are evenly seated and aligned properly. “Proper installation is crucial for bearing longevity,” Allen points out. “An unevenly seated bearing can lead to premature wear and decreased performance. If you’re unsure about your ability to install the bearings correctly, seeking professional help can be a worthwhile investment.”
Allen also highlights the importance of using the right tools for bearing installation. “Specialized tools, such as a bearing press for press-fit bottom brackets, ensure that bearings are installed evenly without damaging the bearing surfaces or the bike frame.”
By incorporating Allen Chen’s expert advice into the bearing installation process, cyclists can make informed decisions about the best bearings for their needs and ensure that those bearings are installed correctly for optimal performance and durability. Remember, while DIY maintenance can be rewarding and cost-effective, there’s no substitute for professional expertise when dealing with critical components like crank bearings.
Reassembling the Crankset
Crank Arm Attachment: Reattach the crank arms to the spindle, ensuring they are opposite each other at a 180-degree angle for proper balance and efficiency.
Tightening Specifications: Follow the manufacturer’s specifications for tightening any bolts or nuts. This ensures the crankset is secure and reduces the risk of damage.
Testing and Fine-tuning
Before taking your bike for a spin, it’s essential to test the crankset for proper installation.
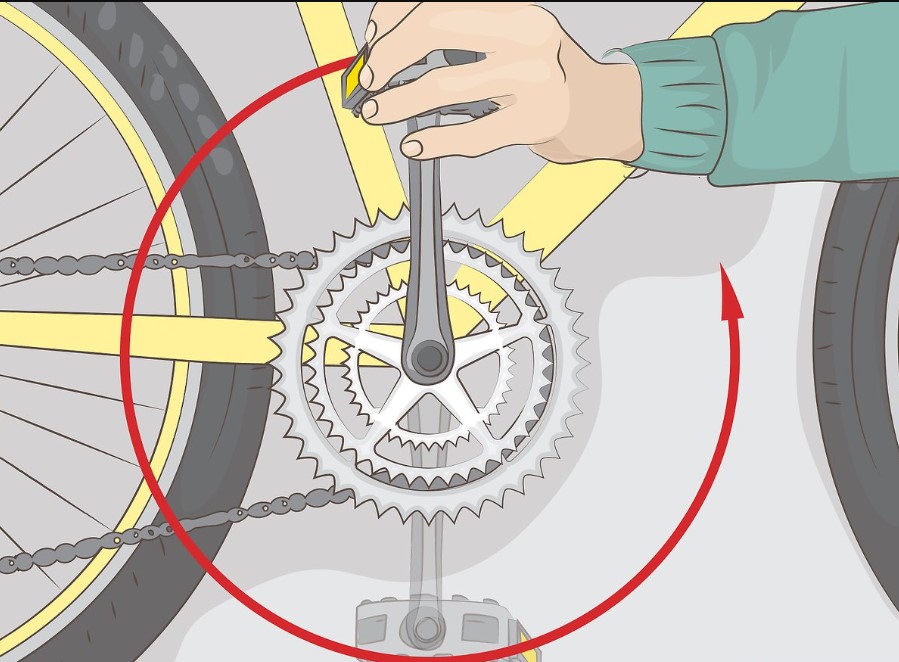
Functional Test: Rotate the crank arms to ensure smooth movement without any play or resistance. Adjust as necessary.
Final Adjustments: Once satisfied with the crankset’s performance, make any final adjustments to the chainrings or pedals.
Safety and Maintenance Tips
Regular maintenance is key to prolonging the life of your bike’s components. Here are some tips to keep in mind:
- Always wear safety gear when performing bike maintenance.
- Avoid over-tightening components, as this can lead to damage.
- Regularly inspect your bike for signs of wear or damage, especially after long rides or exposure to harsh conditions.
Conclusion
Changing the crank bearings on your bicycle is a vital maintenance task that can significantly impact your ride’s quality and efficiency. While the process may seem daunting at first, with the right tools and a bit of patience, it’s a task well within the reach of most cyclists. By following this guide, you’ll ensure that your bike remains in top condition, ready to tackle whatever adventures lie ahead.